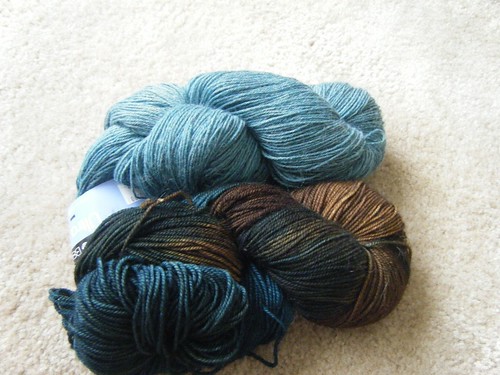
This summer, I've knitted two simple tees that feature shoulder seams that extend down into cap sleeves. After finishing up the first project and finalizing my project post on Ravelry, I saw that someone else who had knitted the same design had converted the shoulder seam stairstep bindoffs to short rows, which allow the shoulder seams to be finished with the 3-needle bind-off technique. I've done this before and immediately realized that it would have been preferable, mostly because it is so much easier to bind off that seam than to sew it.
So now, working on my second project, I'm adopting this approach and documenting it here in hopes that typing it up will fix it in my memory as something that is not difficult and AVOIDS SEWING SEAMS!! These long shoulder seams are very visible, and the 3-needle bind-off is easy to do and provides a basically perfect result.
The primary thing to keep in mind is that the decreases in the short rows happen at the end of the row rather than at the beginning. So if the instructions say to bind off X stitches at the beginning of the row, you simply replace that by leaving X stitches unworked at the end of the short row.
The pattern I'm working on right now is the Simple Tee by Churchmouse Yarns and Teas. In this pattern, the shoulder shaping starts before the neck shaping, so for the first few rows, you can just do the needed decreases on the opposite ends of the row. Once the neck shaping kicks in, if the pattern calls for decreases at the beginning of a right-side row, you have to execute those decreases instead at the end of the following wrong-side row. And likewise, if the pattern calls for decreases at the beginning of a wrong-side row, you execute those decreases at the end of the following right-side row.
It probably sounds confusing, but once you have your pattern in front of you, it's much easier to visualize.
Here's an example doing traditional wrap-and-turn short rows where shoulder shaping is taking place before neck shaping begins:
PATTERN SAYS: Row 1 (RS): Bind off 5 sts, K to end. Row 2 (WS): Bind off 5 sts, P to end.
INSTEAD: Row 1 (RS): Knit to 5 sts before end, wrap and turn. Row 2 (WS): Putl to 5 sts before end, wrap and turn.
This does get a bit complicated once the neck shaping kicks in, but it's worth it.
Once all the decreases have been made, knit (or purl) across the final row to pick up the wraps and then put the stitches on holders to bind off once you're ready to join shoulder seams.
Monday, August 10, 2020
Sunday, January 26, 2020
Italian/Kitchner Cast Off - Better than Tubular!
I'm grateful to the folks who have posted videos on the Italian or Kitchner cast off for 1x1 rib (especially, Suzanne Bryan's video) but I find written instructions easier to reference.
Here are mine:
Setup
Here are mine:
Setup
- Cut yarn to 4x the length of the bound off edge.
- With tapestry needle, pull tail of yarn through the first stitch on the left needle (a knit stitch) purlwise, and leave the stitch on the needle.
- Insert the tapestry needle between the first two stitches on the left needle from back to front and pull needle to front; turn Needle and go through stitch 2 (a purl stitch) as if to knit; pull tail through.
Cast Off
- Bring the needle through the first stitch on the left needle knitwise and drop stitch off the left needle; before pulling the tail through, turn tapestry needle and insert through next knit stitch as if to purl; pull tail through.
- Bring the needle through the first stitch on the left needle purlwise and drop the stitch off the needle; before pulling the tail through, insert the tapestry needle between the next two stitches on the left needle from back to front; turn needle and insert in 2nd stitch on needle (a purl stitch) as if to knit; pull tail through.
- That's it!
Saturday, February 11, 2017
Another New Pattern - This Time for Humans!
The legs are done in Brioche stitch, and we came up with what we think is a clever approach to make them seamless. Check out the pattern to see how we did it!
Sunday, August 7, 2016
Our First Pattern!!
I finally finished a toy project that I've been working on for over a year. It's a "Little Prince" doll from the Arne & Carlos book Strikkedukker, or Knitted Dolls. I've got extensive project notes on Ravelry, and if you're thinking of making this pattern, I encourage you to take a look.
The little guy's outfit had to be customized quite a bit because I wanted to match the look of Antoine de Saint-Exupery's illustrations in the The Little Prince book. One thing he needed was black shoes. Nothing fancy, but the shoes in the Knitted Dolls pattern book didn't look like they would stay on, and the recipient is a baby, so I didn't want shoes that would fall off and get lost forever. An existing pattern for "Uggs" didn't really meet my requirements of actually looking like shoes, so I designed my own.
I'm pretty proud of how they turned out. Here's the free pattern for Strikkedukker Boots with Toppers. Make some!
I finally finished a toy project that I've been working on for over a year. It's a "Little Prince" doll from the Arne & Carlos book Strikkedukker, or Knitted Dolls. I've got extensive project notes on Ravelry, and if you're thinking of making this pattern, I encourage you to take a look.
The little guy's outfit had to be customized quite a bit because I wanted to match the look of Antoine de Saint-Exupery's illustrations in the The Little Prince book. One thing he needed was black shoes. Nothing fancy, but the shoes in the Knitted Dolls pattern book didn't look like they would stay on, and the recipient is a baby, so I didn't want shoes that would fall off and get lost forever. An existing pattern for "Uggs" didn't really meet my requirements of actually looking like shoes, so I designed my own.
I'm pretty proud of how they turned out. Here's the free pattern for Strikkedukker Boots with Toppers. Make some!
Sunday, April 10, 2016
Swatching ... socks???
I have pretended I was swatching for socks in the past, but I don't think I've ever really done it in earnest. Instead, I've cast on the number of stitches the pattern specified, or when a number wasn't specified, a guesstimate, and unless things looked waaay off, I'd just keep going. Such is the nature of socks. They're such a small project, that even when your better judgment says, "I don't think this is working out," the voice of knitterly inertia counters with, "Oh, just keep going. You can always rip this out and start over." Another problem has been that I wasn't working toward a clear goal in terms of size. I have a fear of too-tight socks (commercial socks that were too tight at the top of the leg is what caused me to be interested in hand-knit socks in the first place), so I've never really been a believer in negative ease for socks.
Not too surprisingly, I have knit a lot of socks that don't fit very well. But I'm inspired by Kate Atherley's new book, Custom Socks: Knit to Fit Your Feet, and determined to break the curse. Naturally, this does not necessarily mean that I am following her advice. Yet. Instead of starting by taking all the measurements she recommends, I'm starting with swatching. Because that's what I feel like doing. I will take the measurements -- I promise. I realize that a good set of measurements is one of the keys to success.
I've cast on a random number of stitches -- somewhere around 60 -- using the wonderfully round and squishy 716Twist (can't believe this is 2-ply) and I've knit a 1x1 cuff on sz. 0 and now I'm working in plain stockinette on sz 1 needles. Once I know what my gauge is for this project, I'm planning to start a pair of simple socks with arch shaping for myself. These are for practice.
Later this month, I'm going to spend a few days with my parents in Florida. I've bought some OSU striped BFL from String Theory Colorworks, and I'm going to make a pair of socks for my dad that fit HIS feet. This is a project from the heart because I've learned that a pair of socks I made for him a few years ago as a Christmas gift are his favorite socks. I find that amazing, and it puts Dad on my extremely knit-worthy list, which is short! He also raves about the felted clogs I made for him even longer ago. The great thing about gifting Floridians with hand knits is that they are so grateful to have them when they need them, but they need them so seldom that they last forever!
Note to self: remember to take a tape measure to Florida.
Not too surprisingly, I have knit a lot of socks that don't fit very well. But I'm inspired by Kate Atherley's new book, Custom Socks: Knit to Fit Your Feet, and determined to break the curse. Naturally, this does not necessarily mean that I am following her advice. Yet. Instead of starting by taking all the measurements she recommends, I'm starting with swatching. Because that's what I feel like doing. I will take the measurements -- I promise. I realize that a good set of measurements is one of the keys to success.
I've cast on a random number of stitches -- somewhere around 60 -- using the wonderfully round and squishy 716Twist (can't believe this is 2-ply) and I've knit a 1x1 cuff on sz. 0 and now I'm working in plain stockinette on sz 1 needles. Once I know what my gauge is for this project, I'm planning to start a pair of simple socks with arch shaping for myself. These are for practice.
Later this month, I'm going to spend a few days with my parents in Florida. I've bought some OSU striped BFL from String Theory Colorworks, and I'm going to make a pair of socks for my dad that fit HIS feet. This is a project from the heart because I've learned that a pair of socks I made for him a few years ago as a Christmas gift are his favorite socks. I find that amazing, and it puts Dad on my extremely knit-worthy list, which is short! He also raves about the felted clogs I made for him even longer ago. The great thing about gifting Floridians with hand knits is that they are so grateful to have them when they need them, but they need them so seldom that they last forever!
Note to self: remember to take a tape measure to Florida.
Tuesday, October 22, 2013
Our First Time
Libby and I went to Rhinebeck for the first time this year, and it was wonderful. We saw more knitterati than you can shake a stick knitting needle at, and had fun, short chats with Clara Parks, Stephanie Pearl-McFee and Kay Gardiner.
We indulged in purchase after purchase and were still talking about what ELSE we wanted on the way home.
Today, I saw this video by Gayle Zucker and it brought tears to my eyes while I was laughing at how silly it is.
Sunday, January 15, 2012
Audiobook Recommendations from The Yarn Harlot's Commenters
Right before Christmas, as part of her series of great gift suggestions for knitters, The Yarn Harlot suggested audiobooks. Her commenters proceeded to suggest dozens of authors and titles they've enjoyed listening to. I thought it would be great to have the whole list for easy reference. So I put it into a table, which took quite a bit longer than you might think, and now I'm going to try to make it available here. This link to iDisk may not work after June 2012. If you have trouble, leave a comment.
So how many of these have you listened to or read? I count about 95 for me so far, including other titles by the authors mentioned.
I was inspired by The Harlot's post to subscribe to Audible, and I'm looking forward to working off this list for a long time!
So how many of these have you listened to or read? I count about 95 for me so far, including other titles by the authors mentioned.
I was inspired by The Harlot's post to subscribe to Audible, and I'm looking forward to working off this list for a long time!
Wednesday, October 19, 2011
Our little girl is all grown up!
Mom, did you see Laura's newsletter for River Colors yet? It's her very first try and it's way better than many newsletters I've seen from a variety of shops! Good job, darling sister!
~Libby
~Libby
Saturday, March 5, 2011
Wedding Shawl Musings
Mom suggested I put something up here about the shawl/stole I am planning for the wedding so you guys could see what I'm talking about. The one I like best so far is called Tibetan Clouds Beaded Stole from The Knitter's Book of Wool. So here's a picture from the book:

The stole is a rectangle knit in stages, starting with the central square which grows from the center out and then stitches are picked up on two sides and knit down for the sides. I imagined us knitting this as a trio, me knitting the center and then sending it to Cleveland and you guys each knitting a side section, it that appeals. The piece calls for beads but I'm not sure they're necessary, we can decide that together.
The pattern calls for fingering weight yarn knit at 21sts to 4 ins. in center pattern after blocking which is fairly loose for fingering weight. I bring this up because I see a bunch of these on Ravelry that look HUGE and I don't like that idea, I want it to be manageable, both to knit and to wear! I think the solution there might be going down a needle size or two and choosing a yarn that will have memory.
I have been looking at silk blends because they are so pretty and shiny and the wool content will help with memory. Specifically, I like the idea of Handmaiden MiniMaiden because it is a little lighter than fingering but not yet a lace so it would work well with slightly smaller needle size/gauge. Color is another big issue, I can't decide if it should be "wedding themed" and be knit in a neutral color like those below or if it should be bright, perhaps reflecting choices we make for flowers or even bridesmaids dresses. Here are some colors I do like, if I decide to go neutral.

Mom mentioned the other day she had read a lovely review of Swiss Mountain Silk Cashmere which sounds delightful but it's a little hard to find and this colorway isn't in stock at the only website where I found it. It is also very spendy!!
Another yarn I thought of is Madelinetosh Pashima which is is a wool, silk, cashmere blend and which people seem to LOVE. I like a bunch of the colors, but again, not sure what's right yet. Here are some pictures:


So there you have it, my thoughts so far. Any of you have thoughts?

The stole is a rectangle knit in stages, starting with the central square which grows from the center out and then stitches are picked up on two sides and knit down for the sides. I imagined us knitting this as a trio, me knitting the center and then sending it to Cleveland and you guys each knitting a side section, it that appeals. The piece calls for beads but I'm not sure they're necessary, we can decide that together.
The pattern calls for fingering weight yarn knit at 21sts to 4 ins. in center pattern after blocking which is fairly loose for fingering weight. I bring this up because I see a bunch of these on Ravelry that look HUGE and I don't like that idea, I want it to be manageable, both to knit and to wear! I think the solution there might be going down a needle size or two and choosing a yarn that will have memory.
I have been looking at silk blends because they are so pretty and shiny and the wool content will help with memory. Specifically, I like the idea of Handmaiden MiniMaiden because it is a little lighter than fingering but not yet a lace so it would work well with slightly smaller needle size/gauge. Color is another big issue, I can't decide if it should be "wedding themed" and be knit in a neutral color like those below or if it should be bright, perhaps reflecting choices we make for flowers or even bridesmaids dresses. Here are some colors I do like, if I decide to go neutral.

Mom mentioned the other day she had read a lovely review of Swiss Mountain Silk Cashmere which sounds delightful but it's a little hard to find and this colorway isn't in stock at the only website where I found it. It is also very spendy!!
Another yarn I thought of is Madelinetosh Pashima which is is a wool, silk, cashmere blend and which people seem to LOVE. I like a bunch of the colors, but again, not sure what's right yet. Here are some pictures:

So there you have it, my thoughts so far. Any of you have thoughts?
Sunday, April 18, 2010
Blogging Summery Olivia Jacket

Libby was here last weekend to help out at Knitter's Fantasy (and she was a HUGE help - I might have managed the Caps for Kids table OK, but I never could have had such a successful Magic Loop class without her - and we had FUN!!).
We were looking at Ravelry for some reason (who needs a reason?) and she commented that my comments on my projects were more like blog entries. And I was struck once again that it's true, Ravelry has done a lot to provide the kind of outlet I wanted to document and share what I'm knitting on. But hardly anyone reads my Ravelry entries, including the girls, in part because they're so darned long. So I thought maybe I could use the blog to enter thoughts about projects (just the big thoughts, like what cast-on to use or other enhancements/deviations from the pattern) and on Ravelry, I'd stick more to pickier stuff.
I haven't totally figured it out, but I'm going to use my Summery Olivia Jacket as an experiment, blogging say, no more than a couple of times a week and using Ravelry to record the details and between-blog-post minutiae. This way, maybe Laura will find this of value, too, some day, once she gets her knitting mojo back.
I started Summery Olivia on Friday night, made rather stunning progress (even with a fiddly new-to-me cast-on) and had an impressive three inches to show the ladies at the Knitting Fantasy wrap-up party on Saturday night, where I ended up frogging all those inches and that beautiful cast-on. I'm blaming it on Kim Hargreaves.
I'm doing a lot of math on this baby because I'm substituting an aran-weight yarn for a DK-weight yarn. The shape and style is quite simple, and this shouldn't be much of a problem (shut up - I know). So anyhow, I come up with the multiplier to convert Kim's stitch count to mine (it's .7) and happily do conversions for the first piece - the back. After knitting afore-mentioned three inches, I decide to do a gauge check (very much out of character, but apparently even a stubborn old delusional optimist can learn) and I realize my width is 2.25 inches wider than the schematic. Assuming this is my old nemesis, the lying gauge swatch, at work, I begin measuring my stitch count and my original swatch, and discover to my great surprise that everything is exactly as it should be and the source of the problem is that Kim's original stitch count does not jive with the schematic. Her original stitch count results in a piece that is two inches wider than the schematic.
So I debated. Do I just follow the stitch count and ignore the schematic or do I knit to the schematic? I'm redoing all the math anyhow, so either way is about equally difficult. Then I put Summery Olivia in time out and worked on finishing my Blue Shimmer cuffs.
At the party last night, I held up my work in progress, and everyone agreed it was way too wide, even taking into account the a-line shape. So I just pulled out the needle and started frogging. Then I tried to remember what I did to alter the instructions for the Alternate Cable Cast-On, couldn't, and put Summery Olivia back into time out and worked on trying to do a tubular cast-on in totally inadequate lighting. You can imagine how that worked out.
When I got home, I looked up the Alternate Cable cast-on directions (scroll to bottom of page - this is that great cast-on I discovered from the free Hermione's Hat pattern which, by the way, is really cute) and realized just doing it exactly as written would work perfectly, and now I'm working again and I've got more than an inch to show already this morning, which isn't bad considering I only got up an hour and a half ago.
Moral of story - always work on aran yarn and size 8 needles. Three inches is nothing!
Saturday, March 20, 2010

This photo, besides depicting my silly, sleepy kitty (and the funny white patch on his, ahem... tummy...), contains my newest knitting project -- one of these which starts by casting on a bunch of stitches and then joining in the round, carefully not twisting. This is a loop shaped scarf and the pattern is completely reversible so I had briefly considered making it a mobius but decided against. I'm sure you can see where this is going... I did in fact twist the cast on, despite multiple checks on the joining row, the first, second, and third patten rows. By the fourth, I found the problem but had just, JUST reached the point from which I could not happily consider starting over. Oh well, mobius it is. Sigh.
P.S. you should enter the comments give-away at Rainey Sisters. It's their anniversary.
~Libby
What? You want more kitty pictures? Oh, alright. :)

Saturday, December 19, 2009
Grandpa's Getting One Sock

A Christmas Story: It's late on December 18 (actually, early on the 19th) and the only creature stirring in the house is the crazy knitter in the rocking chair. This crazed individual realizes that even Lands End is warning that the remaining time to ship holiday packages is more-or-less non-existent at this point. But that doesn't worry her. Her mother's linen/cotton clapotis wrap is done, blocked and beautiful. And her father's socks are so close to being done that there is no worry about them being washed, blocked and sweetly wrapped and everything packaged for delivery to the Fed Ex counter on Monday.
The crazy knitter is finally getting sleepy and in the time-honored tradition of knitters everywhere, stops to take stock of the evening's progress on sock #2 before dragging herself off to bed. Holding said sock, upon which she has just finished the really fun gusset section (she loves this Oliver pattern) up against sock #1 to see about how much knitting she has to go before toe shaping, it hits her. Sock #2 is a little bit narrower than sock #1.
Keep in mind that she has been comparing sock #2 to sock #1 at regular intervals. She checked to make sure the legs were the same length and that the striping was coming out matchy matchy. (It was.) That the heel flaps were the same height. (They were.) And that her new, documented (on a Post-It) technique for ensuring no hole at the top of the heel gusset didn't create a distinctly different look than whatever she had done, but by now forgotten, to accomplish the same goal on sock #1. (It looked great. More on the genius technique below.)
In all this comparing, she had not one inkling that the circumfrence was different. No reason to consider why this might be so. And not the slightest clue that she had FORGOTTEN TO SWITCH TO THE SZ. 1 NEEDLES AFTER DOING THE TOP RIBBING ON SZ. 0s.
On Monday, she will be shipping the one sock with a long note of explanation and regret.
The good news? I can start Laura's present now!!
Knit on with love and optimism,
Judi
P.S. So here's the trick at the top of the gusset. Between the picked-up stitches on the heel flap edge and the instep stitches, pick up two stitches by snagging the sides of the two stitches to either side of the "bar" of yarn that spans the gap. (Check out Charlene Surch's Sensational Knitted Socks for a better explanation.) These two extra stitches belong to the gusset, not to the instep. Then, when doing the first decrease row, do your K2tog on the right side, then K3tog, then knit the instep stitches, then K3tog, then SSK on the left side. You're now back to your original stitch count. The result is beautiful and doesn't mess up the stitch patterning on the instep one little bit.
Wednesday, July 29, 2009
For Wussies

hehe. nataliedee.com she is funny :)
Luckily, the things I am working on currently are going well and I will not be needing to rant about gauge for a while. Making toys as examples for a toy class is super fun, the finished size doesn't matter AT ALL!!!! And the featherweight cardigan I started for myself is going well and has not done any wild fluctuation. I will upload pictures soon, I swear. I am not doing it now because right this minute I have to stop writing this so I can pack a bag so Colin and I can leave after work to see Kate and Chad who are in the US for a short visit. We're going up to DC to see them and Patrick and Emily who are kindly hosting us all. I hope. I called Patrick yesterday to confirm plans and offer to bring something and the poor guy thought this was happening weeks from now. Oh dear. I'm sure we'll still have lots of fun, it will just be more um... chaotic.
Ok, seriously, going now, pictures tomorrow!
Friday, July 10, 2009
ARGH
Grrr...
Why do swatches lie?
I just ripped out a lot of work. Because this sample sweater was WAY too big. I couldn't figure out why. My gauge swatch was perfect. Except then I checked the gauge just to rule it out and....it was bad. Very bad. So I ripped. It's a sample. It needs to be right. And this is Karmic punishment for me telling people repeatedly that to get sweaters that fit they have to be willing to rip things when they're wrong. Sigh. So a week's work is reduced to a very large ball of crinkly. And, no, I didn't break rule 1 and rip in the middle of the night. I am jumping right back in, time is money with samples.
Anyhow, just needed to vent a touch...knew you guys would understand.
Love you,
Libby
Why do swatches lie?
I just ripped out a lot of work. Because this sample sweater was WAY too big. I couldn't figure out why. My gauge swatch was perfect. Except then I checked the gauge just to rule it out and....it was bad. Very bad. So I ripped. It's a sample. It needs to be right. And this is Karmic punishment for me telling people repeatedly that to get sweaters that fit they have to be willing to rip things when they're wrong. Sigh. So a week's work is reduced to a very large ball of crinkly. And, no, I didn't break rule 1 and rip in the middle of the night. I am jumping right back in, time is money with samples.
Anyhow, just needed to vent a touch...knew you guys would understand.
Love you,
Libby
Tuesday, June 9, 2009
Hi blog!
I'm back with a request for opinions. While I'm working away on existing projects, I have started to think about what I would like to start next. This is new for me, ususally I just start things, not really bothering to think of what I would like to do BEST. Being the summer, I think I would like to work on something rather lightweight and have been meaning to make another triangle shawl because I acutally get a lot of use out of my Icarus and Silk Kerchief.
I read a blog called Through the Loops and she has been publishing lots of fun patterns in the last several months, but I've really been taken with Ulmus. I love the color combinations I've seen on Ravelry (they're worth looking at, go ahead, I'll wait). So I got out some sock yarn to look at potential color combinations for myself. I have photographed them and would love to hear what you think.
Option One: Berroco Ultra Alpaca Fine in a medium blue with Prism Saki in a blue and brown varigated.
Option Two: Ella Rae Merino Lace in varigated pinky brown with Impulse of Delight Summit Sock in Blackberry, a deep purple mix.
Option Three: Two shades of Koigu, one a sky blue mix, the other a redish brown mix.
Option Four: Two shades of Dream in Color Smooshy, Go Go Grassy and Wisterious.
Those were my favorites and the best combos as far as texture combinations go too. What is your favorite? And why of course! Let's see what you guys have been working on!
Oh, and I added some pictures to Ravelry today; one showing the progress on the log cabin blanket (significant!) and the other showing a completely new and finished project, the Spidery Tank. Check them out!
Love you guys!
~Libby
Monday, May 25, 2009
Porom Gauge
Hi everyone, but Libby specifically, I was wondering if you had made the Porom hat yet, and if so, if you had any trouble finding a yarn with which you could manage the proper gauge. Mom and I just bought a dk weight yarn because the Blue Sky alpaca silk (I know you were wondering what the content was before Mom, so there you are) stuff that you generously gave me wasn't working out for this pattern. (I made a different floppy hat instead, it's still pretty neat.) Anyway, if you have the pattern handy, could you consult with me on maybe increasing the number of stitches so that I can make a smaller gauge without making a smaller hat? I think it could just be any number divisible by twenty (because that's how many sts there are in chart B), but I'm not sure how the crown shapping will work, obviously with more stitches there will have to be more decrease rows. I know you're busy and I may be able to figure this out on my own, but if you get a chance I'd appreciate a consult. Also, do you think you could email me the Thermis pattern? Please and thank you.
Love to everyone,
Laura Anne
Love to everyone,
Laura Anne
Sunday, May 24, 2009
I love this, I couldn't really tell from the picture what you were talking about...you and laura crack me up sometimes! I think we should post the rules in the sidebar to keep track!
Very soon I promise to post photos of the blanket in progress and soon after that I promise pictures of the apartment and my stash organization efforts. After THAT I will indulge in a discussion (monologue perhaps?) regarding what I want to cast on (or rescue from UFO-hood) to provide a bit more stimulation than giant garter stitch rectangles. Consider this post a placeholder for those more interesting posts to come!
love you~
Very soon I promise to post photos of the blanket in progress and soon after that I promise pictures of the apartment and my stash organization efforts. After THAT I will indulge in a discussion (monologue perhaps?) regarding what I want to cast on (or rescue from UFO-hood) to provide a bit more stimulation than giant garter stitch rectangles. Consider this post a placeholder for those more interesting posts to come!
love you~
Wednesday, May 20, 2009
No Mother/Daughter Blog Would be Complete Without This

A list of rules! Granted, I don't have a whole list for you today. Just a rule that I applied (uncharacteristically) last night, and I'm so glad I did. So here it is, (ta da!) rule #1 in the Tightly Knit Rule Book:
1. No frogging after 11 p.m.
While I'm at it, here's rule #2:
2. Always, always, always have an unfinished scarf or sock (or three) handy to make it even conceivably possible to adhere to rule #1.
This morning, I see that the hideously stretched out edge stitch on the right front of my current project is not the result of a mistake in laddering, reladdering and then, for good measure, laddering again both of the twisted stockinette stitch stitches adjacent to the slipped edge stitch all the way down to the cast-on edge. No, my dear daughters, it was the result of being stretched out. And as every modern knitter (post Stitch and Bitch, that is) should know, it is in our power to wrestle stretched out stitches into submission.
So why am I displaying the "wrong" side of my edge? Because, dear girls, that is where the slipped edge stitch rolls to hide in this ingenious edge treatment. And don't they all look remarkably even and under control? It is wonderful to have this power. And I'd have never felt such joy if I had done what seemed like the only logical next step last night when it was past my bedtime and frogged the damn thing. I'm not saying these are the world's most even stitches, but they are fine.
And just to leave you with a little eye candy, here's what the front side looks like.

Knit on!
Judi
Tuesday, May 19, 2009
Another Great Knitting Magazine
Dear Girls,
Have you been holding out on me? I just randomly clicked on an ad on Ravelry (hardly ever do that unless I'm seriously interested, since I know it costs the advertiser half a penny or something like that) and am now in love with Knotions Magazine. How come I didn't know about this? I think it replaces MagKnits, which I never knew about, either, until it was history.

Here's the reason love Knotions so much. I've been searching hard for a shell to make to go under my current project. I've done several really serious searches on Ravelry, and even though I saw this, it didn't stand out from the crowd for some reason. I'm sure I can modify this a little to echo some of the design elements of the Retro Jacket. I'm so excited!
Judi
Have you been holding out on me? I just randomly clicked on an ad on Ravelry (hardly ever do that unless I'm seriously interested, since I know it costs the advertiser half a penny or something like that) and am now in love with Knotions Magazine. How come I didn't know about this? I think it replaces MagKnits, which I never knew about, either, until it was history.

Here's the reason love Knotions so much. I've been searching hard for a shell to make to go under my current project. I've done several really serious searches on Ravelry, and even though I saw this, it didn't stand out from the crowd for some reason. I'm sure I can modify this a little to echo some of the design elements of the Retro Jacket. I'm so excited!
Judi
Thursday, May 14, 2009
From Judi: And Here We Are Again!

Well, my dear Libby, Baltimore doesn't know how lucky it is to have such an accomplished knitter moving in. And Cleveland's knitting community is a diminished thing without you in our midst.
But I am not sad because we are Tightly Knit! And even though you only semi-officially moved out this morning (leaving a shocking amount of stuff behind in some very unexpected places), I have a knitting dilemma and need your advice.
As you know, last night I started the Drop Stitch Scarf, #13 from VogueKnitting Spring/Summer 2009, and even though it is mega fun to knit the triple-wrap stitches to get the cross-wise "ladders," I'm dying see how it looks with the dropped stitches laddered, too. The pattern doesn't have you do this until the end. There's no way I can wait 'till the end. I know we freely laddered Jeanie while in progress, but I can't remember what we did with the top stitch. Just pick it up (as in a M1) and knit into it on the next row? Will that work?
After Judy G's experience with The Clap, I suddenly have a deathly fear of knitting an entire scarf only to find out the drop stitches won't drop! Tried to Google this question and got nothing I could use. You are my only hope. Am praying you took your computer to Baltimore!
Subscribe to:
Posts (Atom)